VMSS Flexible Mode Networking Requirement
You might already notice when you create VMSS using az cli. The default orchestration mode will be changed to Flexible mode in November 2023. One big difference in creating the VMSS Flex is that it requires explicit outbound connectivity configured.
Recently I took a case that customer has special networking requirements for creating VMSS Flex. I took the chance to have a deep dive of configuring the networking for VMSS Flex. I’d like to share it here.
Customer’s requirements
Customer needs to create VMSS with Flexible orchestration mode. He needs to create in an existing vNet “prdvmss-vnet” and subnet “prdvmss-subnet1”. There are no Load Balancer or NAT gateway allowed to be created in the vNet. Their organization also doesn’t allow any public IP used in Azure environment.
The issue Customer met
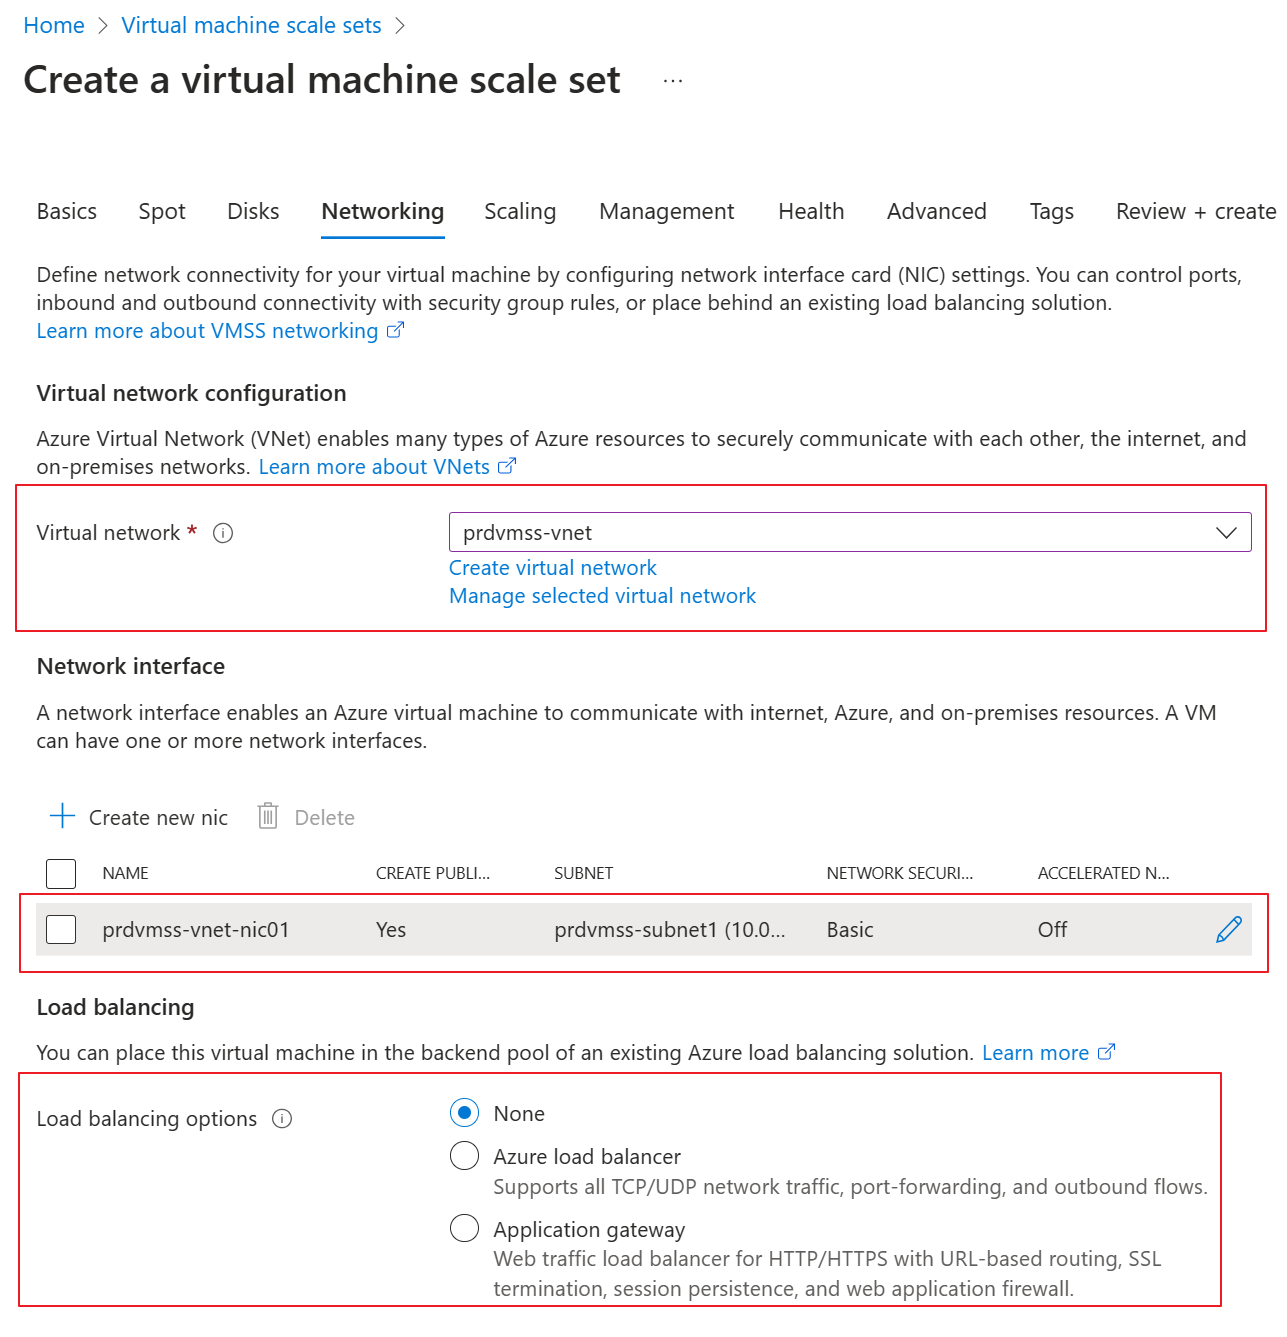
Customer tried to create the VMSS in the portal. He chose the existing vnet and subnet. He kept the LB setting as none.
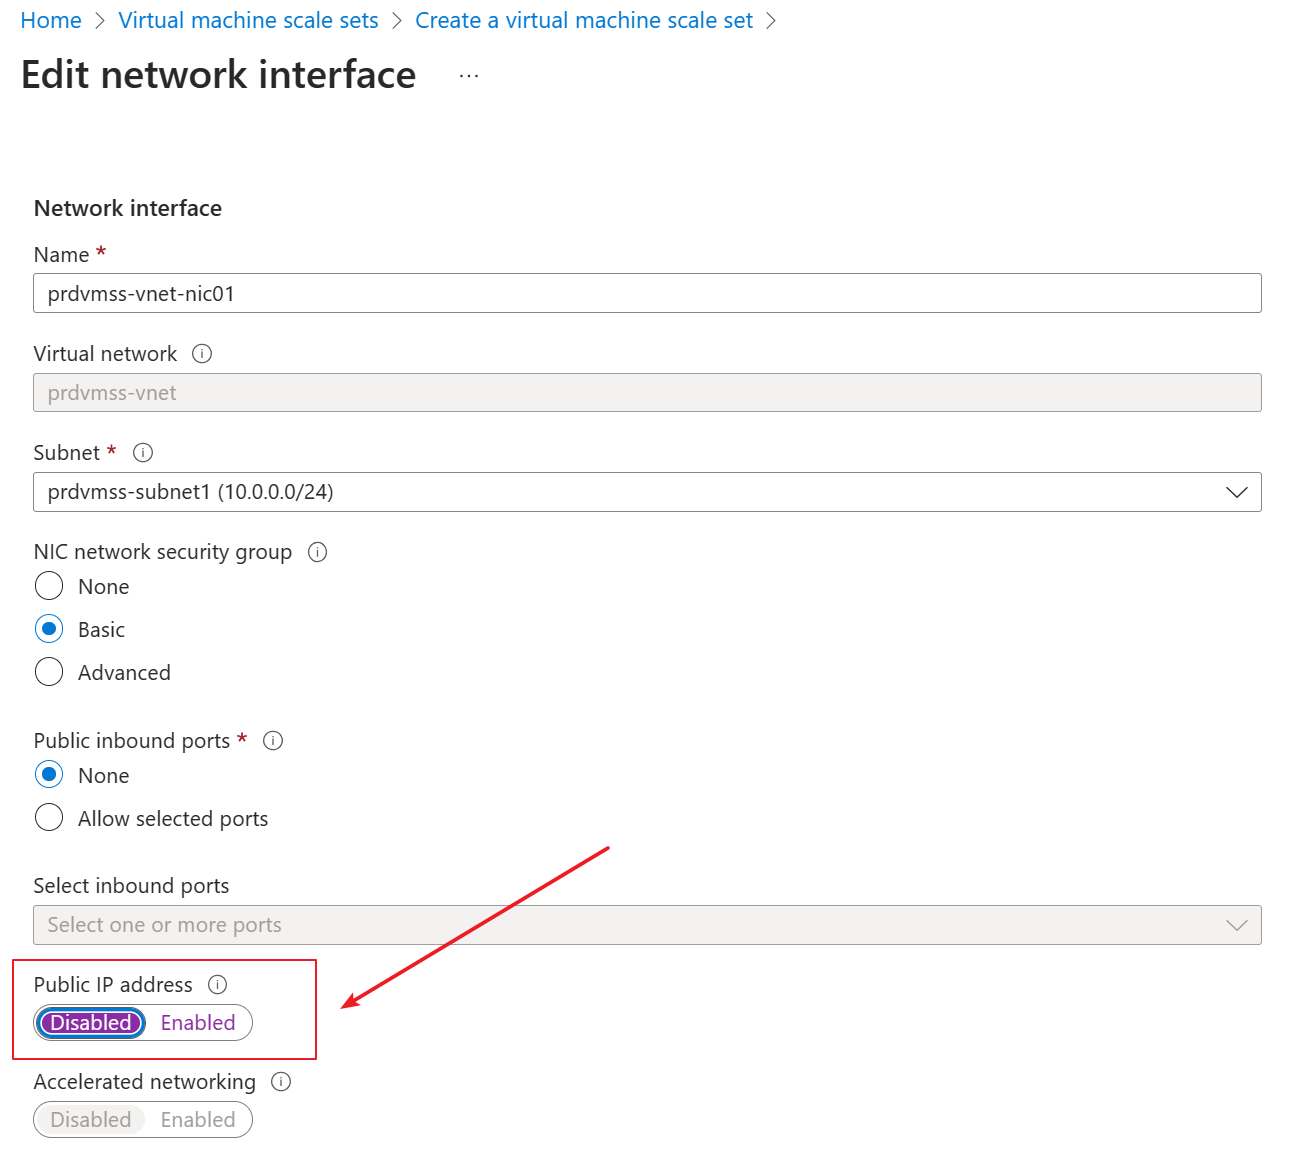
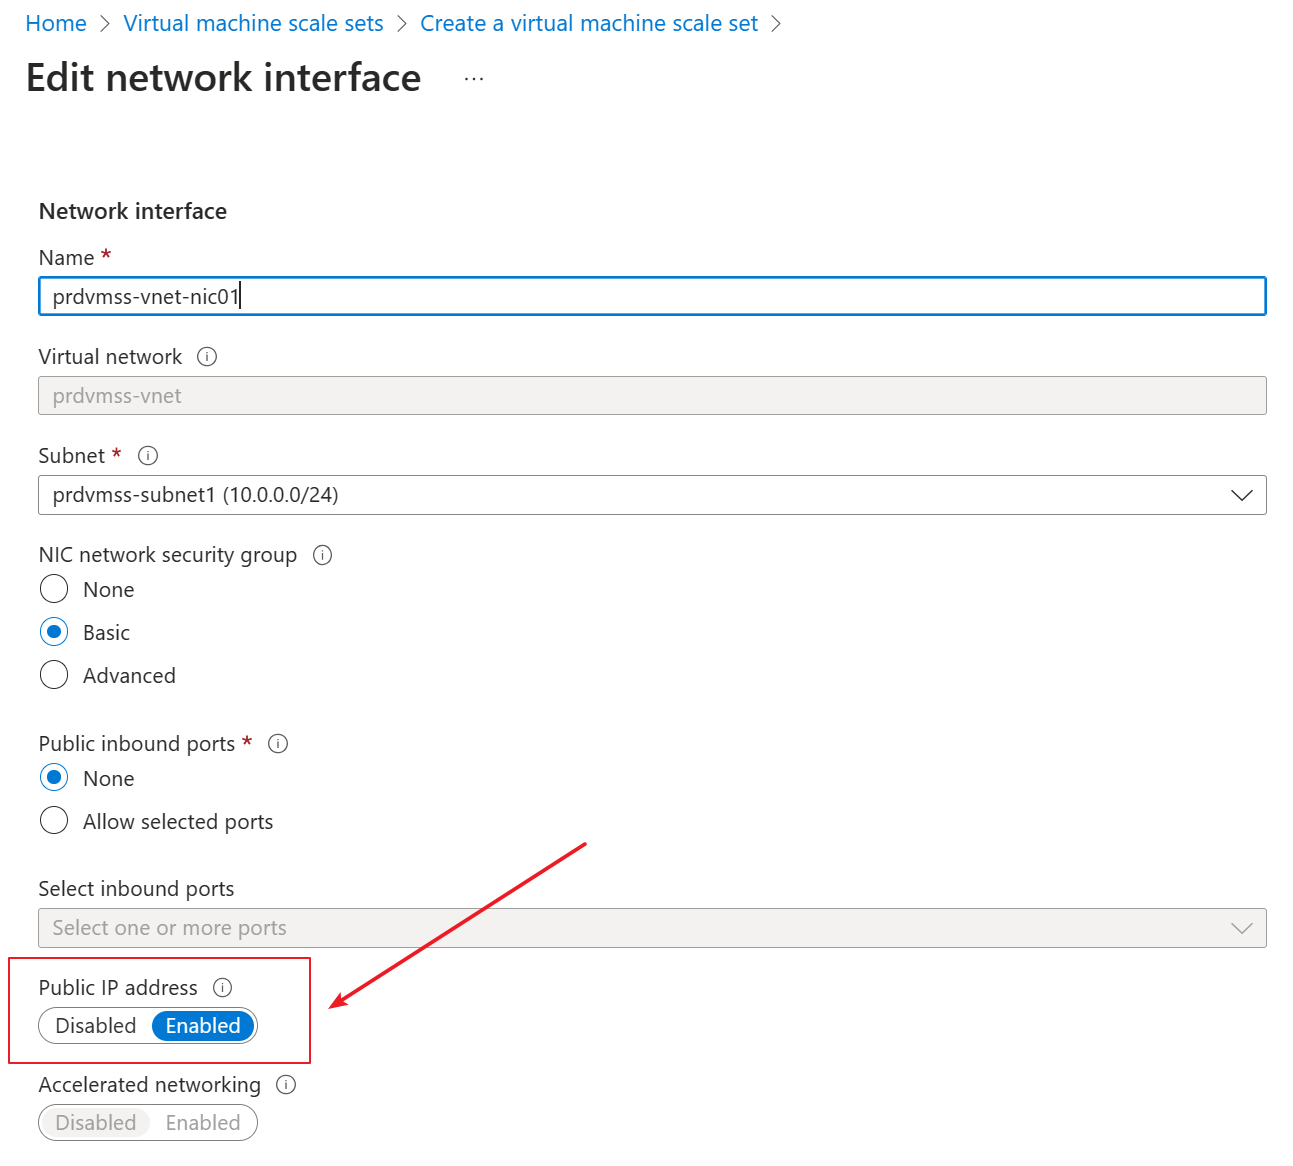
He edited the vnic to disable the public IP.
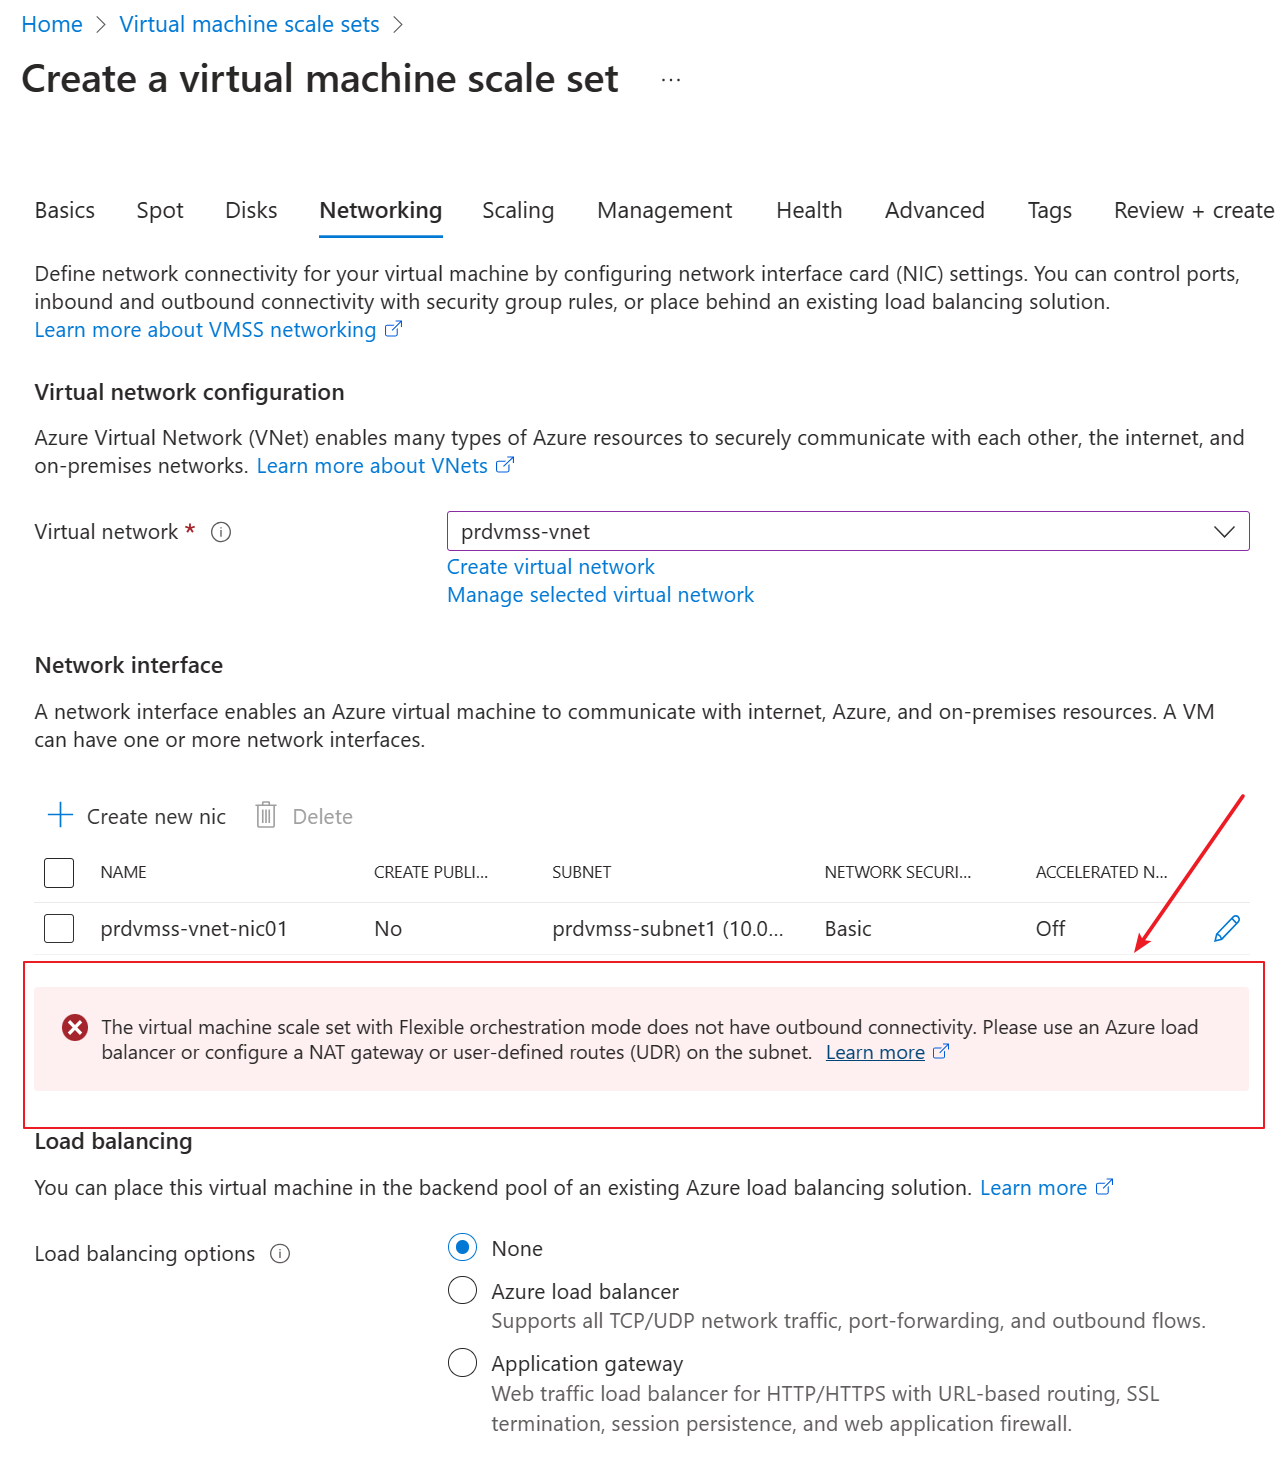
After he clicked ok to save and returned to the VMSS creating page, he found a warning showing that “The virtual machine scale set with Flexible orchestration mode does not have outbound connectivity. Please use an Azure load balancer or configure a NAT gateway or user-defined routes (UDR) on the subnet.”
He failed to create the VMSS in the Azure portal. He remembered that previous he created VMSS with uniform orchestration using the same steps and he was able to create it successfully.
Why customer failed to create VMSS Flex?
As per the Azure document https://learn.microsoft.com/en-us/azure/virtual-machine-scale-sets/virtual-machine-scale-sets-networking?tabs=portal1#explicit-network-outbound-connectivity-for-flexible-scale-sets,
In order to enhance default network security, Virtual Machine Scale Sets with Flexible orchestration will require that instances created implicitly via the autoscaling profile have outbound connectivity defined explicitly through one of the following methods: • For most scenarios, we recommend NAT Gateway attached to the subnet. • For scenarios with high security requirements or when using Azure Firewall or Network Virtual Appliance (NVA), you can specify a custom User Defined Route as next hop through firewall. • Instances are in the backend pool of a Standard SKU Azure Load Balancer. • Attach a Public IP Address to the instance network interface. With single instance VMs and Virtual Machine Scale Sets with Uniform orchestration, outbound connectivity is provided automatically.
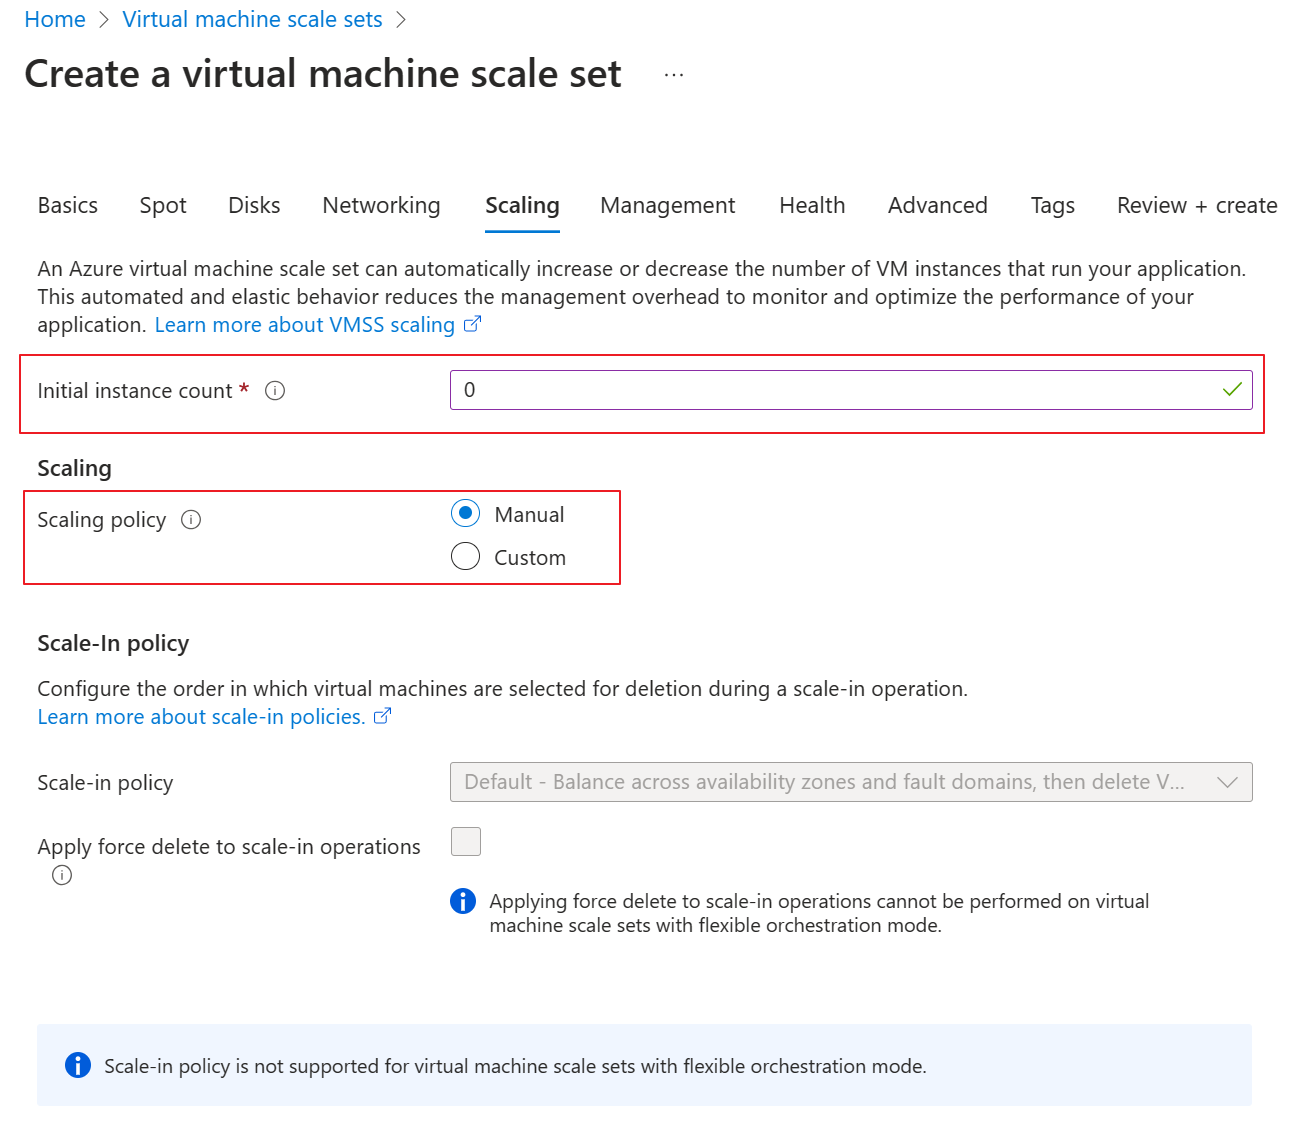
It means that when creating VMSS Flex, it requires explicit outbound connectivity specified using the above 4 methods. Otherwise, the deployment would fail. After doing some lab tests, I found even I set the initial instance count to 0, it requires explicit outbound connectivity configured.
How can customer create the VMSS Flex while meeting their network requirement?
Here are the workaround I figured out:
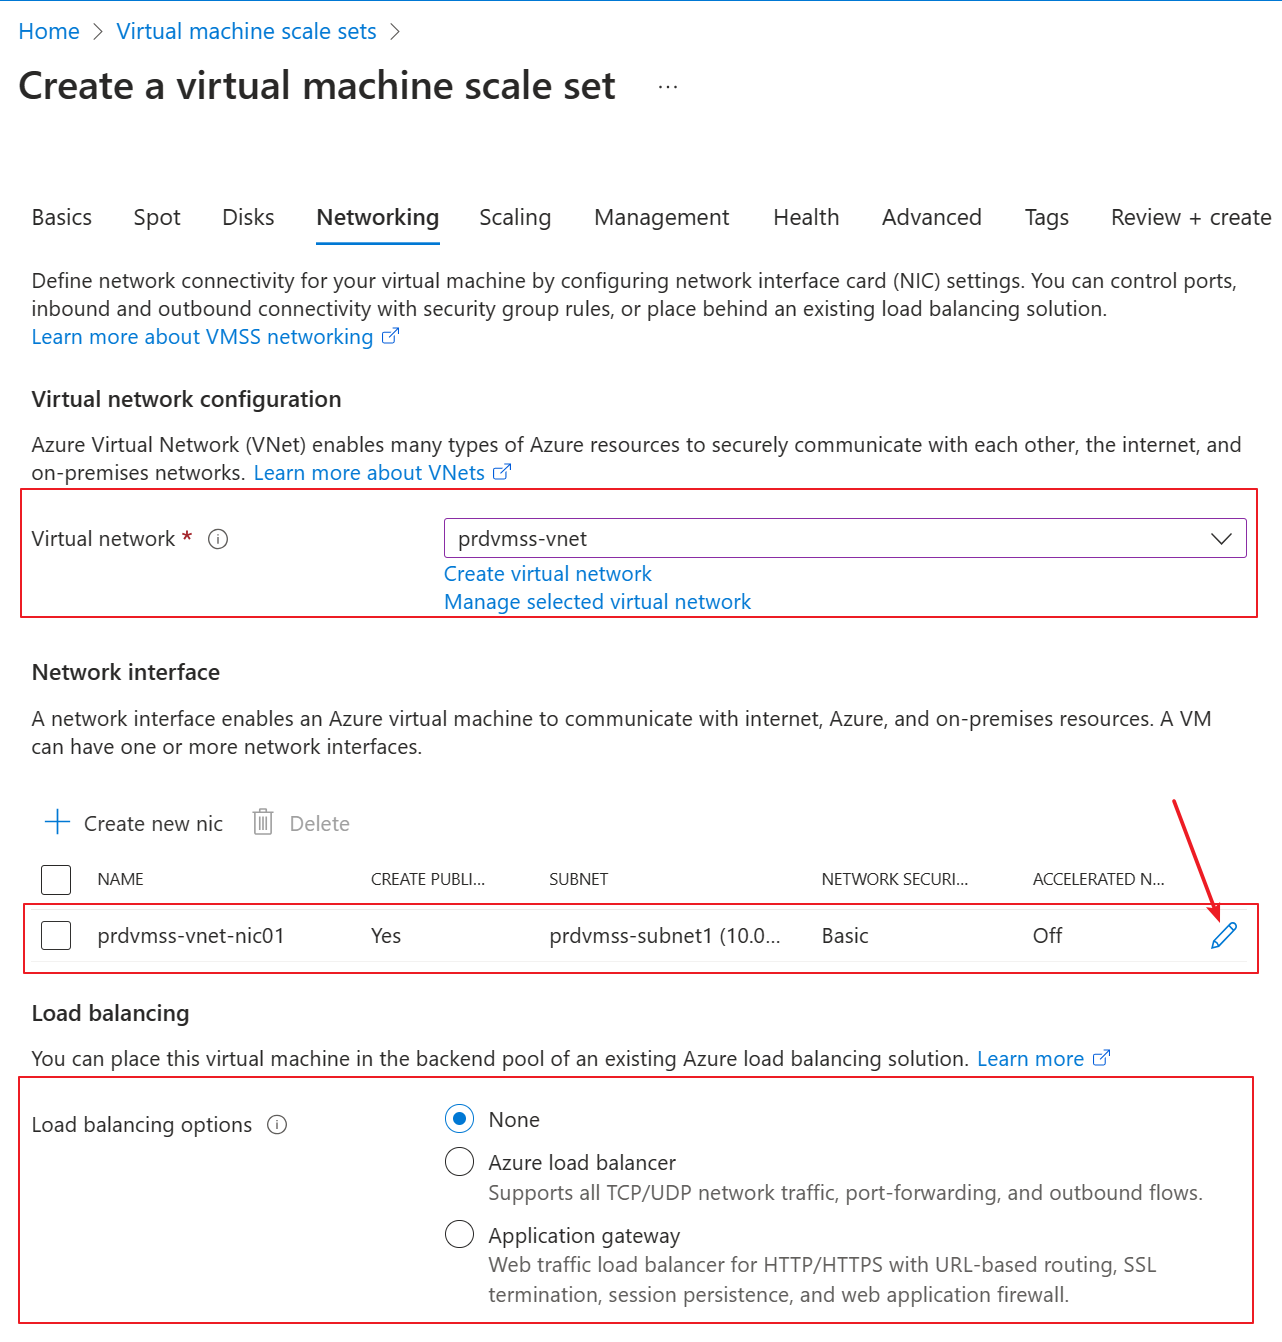
Go to the portal to create the VMSS. In the Networking tab, choose the existing vnet and subnet.
Keep the public IP address as enabled.
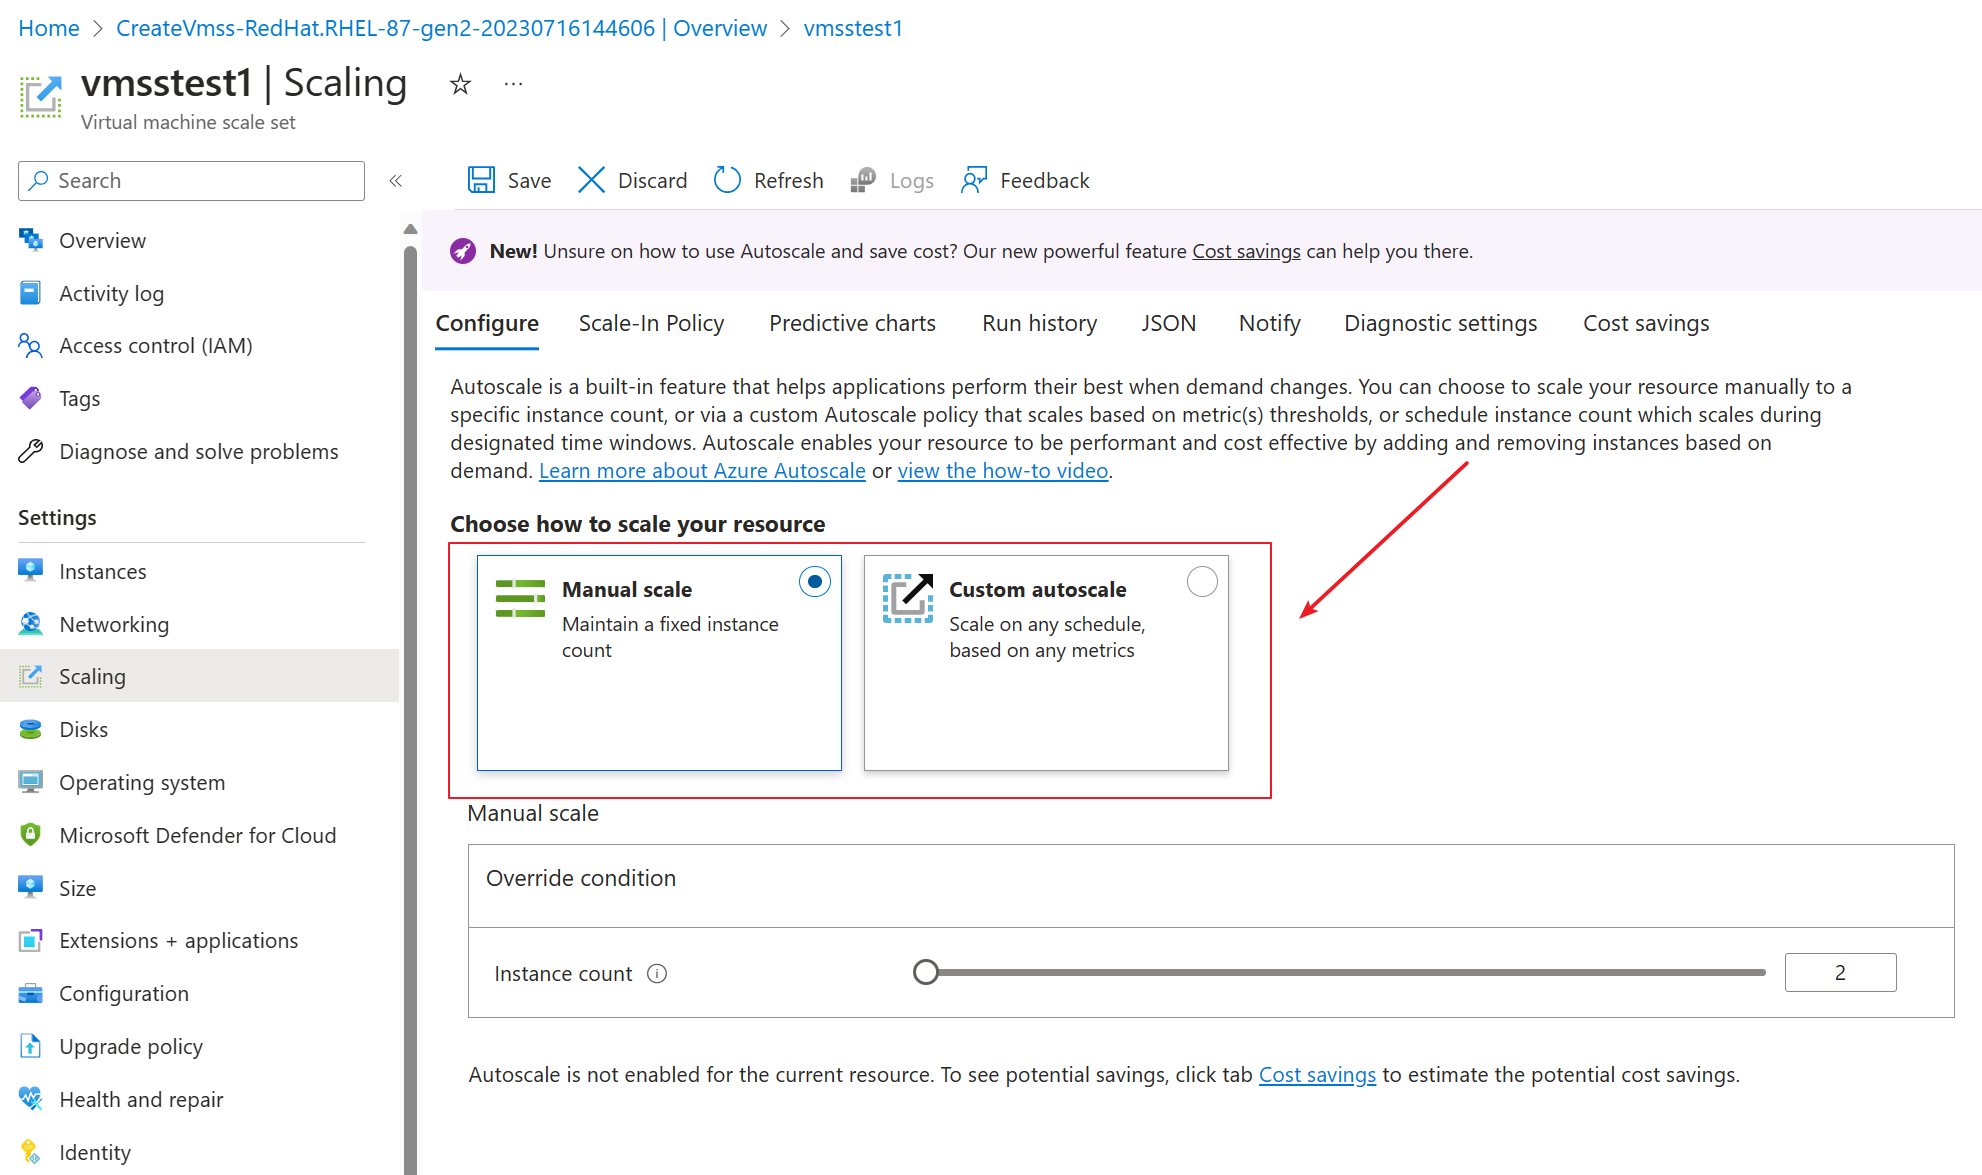
Go to the scaling tab and change the “Initial instance count” to 0; Choose the “Scaling policy” to Manual.
Review and create the VMSS.
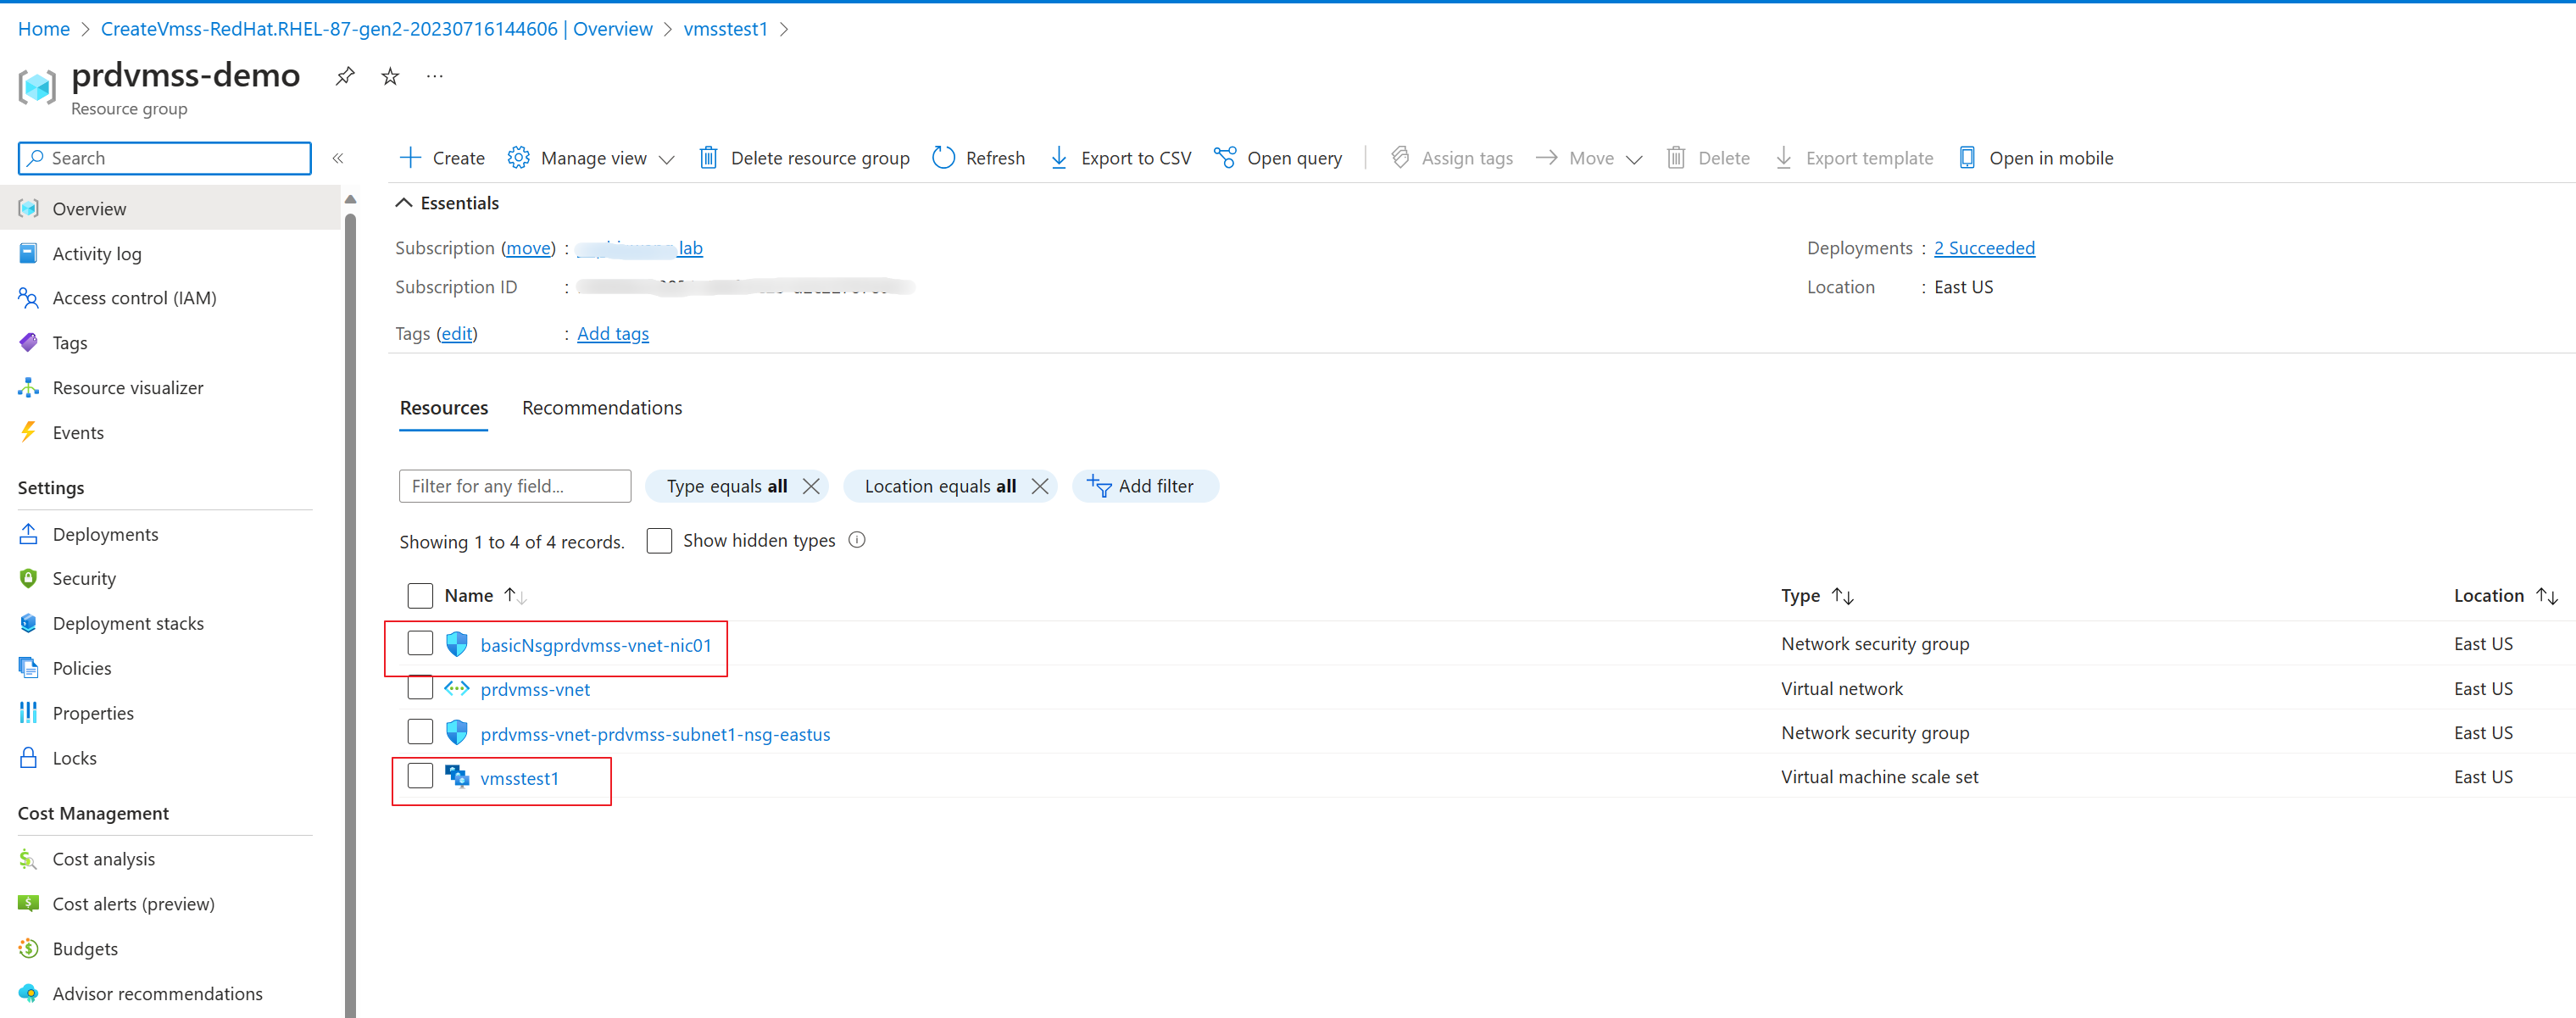
Although we chose public IP for the network interface, there won’t be any public IP address created because we have set the initial instance count to 0. As you can see in the screenshot, besides the existing vnet and subnet, there is only VMSS and one NSG created.
If customer needs to use az cli command to complete the above steps, here is the command. The key parameters are highlighted in bold. It’s important to set load balancer to empty value, otherwise there will be LB created by default.
az vmss create
–resource-group prdvmss-demo
–location eastus
–name vmsstest2
–platform-fault-domain-count 1
–orchestration-mode Flexible
–vnet-name prdvmss-vnet
–subnet prdvmss-subnet1
–public-ip-per-vm
–load-balancer “”
–image Ubuntu2204
–instance-count 0
–admin-username azureuser
–admin-password xxxxxx
After the VMSS is created successfully, customer needs to add VMs manually to the VMSS. Customer can add both Linux or windows VM to this VMSS. This is one of the unique feature of VMSS Flex comparing to VMSS uniform.
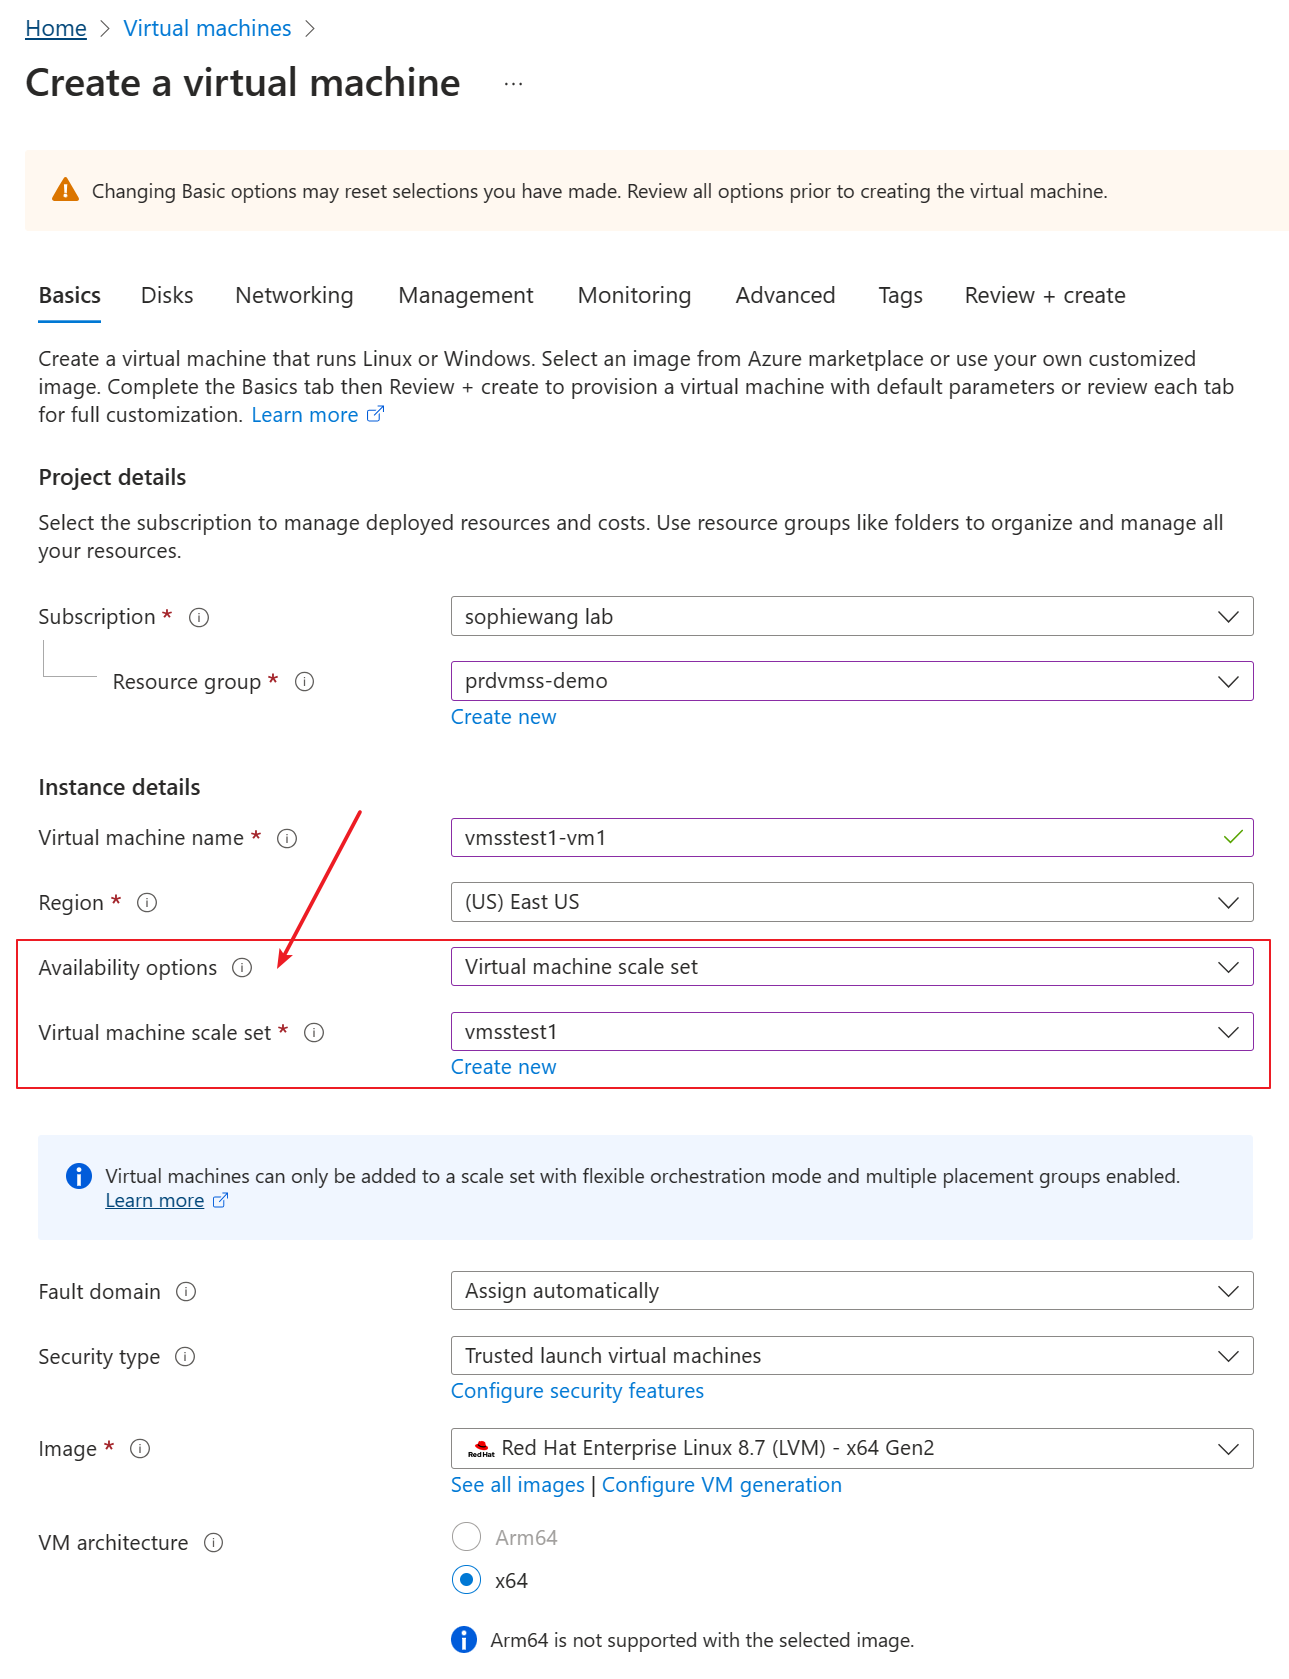
Go to the portal to create VM. In the “Availability options”, choose “Virtual Machine scale set” and the VMSS you created, then the VM will be added to the VMSS.
In the Networking tab, change the Public IP to None and Keep LB as none. Remember this customer doesn’t allow to use LB or public IP.

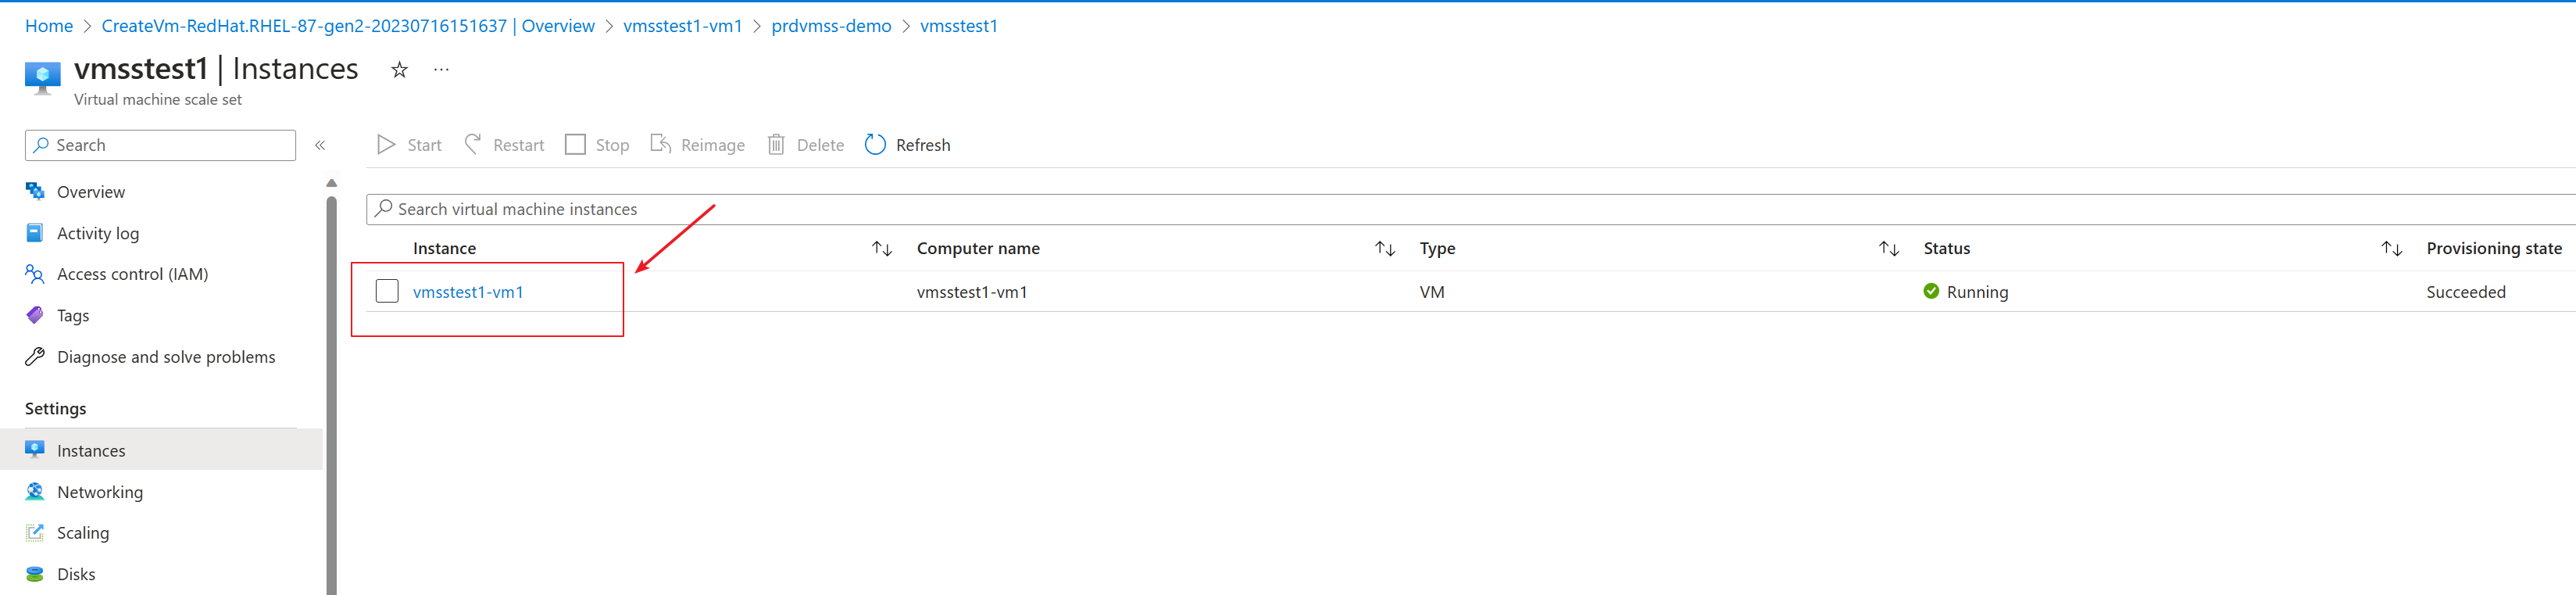
Review and create this VM. It becomes one of the instance of the VMSS.
The trade-off of this workaround is that customer cannot use both manual and auto scale method to add multiple instances simultaneously to the VMSS.
If we choose to adding instances using the scale method, it will create instances with public IPs, which violates this customer’s requirement. Because when we create the VMSS initially, we actually choose to use “Attach a Public IP Address to the instance network interface.” to get rid of the warning that ““The virtual machine scale set with Flexible orchestration mode does not have outbound connectivity.”